Welcome to MergeNinja! Follow this guide to quickly set up your account, connect it to QuickBooks Online, and start creating your first mail merges. This article will walk you through each step to help you get up and running.
Step 1: Sign Up for MergeNinja
- Visit the MergeNinja website:
Head over to MergeNinja.com and click on the Sign Up button in the top right corner. - Fill in your details:
Enter your name, email address, and create a secure password. Ensure your email is valid, as it will be used for important account notifications. - Complete registration:
Click Create Account, and you’ll receive a confirmation email. Click the link in the email to verify your account. - Your plan:
By default you will have a 7 day free trial on the Standard Plan which includes unlimited templates, users, and mail merge reports. - Add a Credit Card:
Before your trial ends, you’ll need to add a credit card to continue using the service. Don’t worry—you won’t be charged until your 7-day trial is complete.
Step 2: Log In to Your Account
Once your account is verified, log in to MergeNinja:
- Visit the MergeNinja homepage. Or app.MergeNinja.com to log in.
- Click on Log In at the top right corner.
- Enter your email and password, then click Sign In.
Step 3: Connect Your QuickBooks Online Account
After signing up, you’ll need to connect your QuickBooks Online account to MergeNinja. Follow these steps:
- Click the “Connect to QuickBooks” Button:
Once you’ve signed up and logged into MergeNinja, you’ll see a Connect to QuickBooks button on your dashboard. - Log In to QuickBooks:
Clicking the button will redirect you to the QuickBooks sign-in page. Enter your QuickBooks Online credentials to log in. - Authorize MergeNinja:
After signing in, QuickBooks will ask you to authorize MergeNinja to access your customer data. Click Authorize to complete the connection.
Once authorized, your QuickBooks data will sync with MergeNinja, allowing you to start creating mail merges right away.you’ll be ready to create mail merges.
Step 4: Explore the MergeNinja Dashboard
After connecting QuickBooks, you’ll be taken to the MergeNinja Dashboard. Here’s a quick overview of what you’ll find:
- Mail Merge Templates: Access and create customizable templates for your mail merges.
- Reports: View and manage your mail merge reports.
- Account Settings: Manage your account details and billing information.
- QuickBooks Sync Status: Check the sync status of your QuickBooks Online account.
Step 5: Create Your First Mail Merge Template
- Navigate to Templates:
On the dashboard, click Templates from the left-hand menu. - Create New Template:
Click on Create New Template to start building your mail merge. You’ll be directed to the built-in template generator. - Customize Your Template:
MergeNinja’s template generator works similarly to Microsoft Word. You can:- Add placeholders for customer data (like name, address, email).
- Adjust formatting, fonts, and layout.
- Save your template for future use.
- Save Your Template:
Once you’re happy with your template, click Save.
Step 6: Generate Your First Mail Merge
Once your template is created, you’re ready to select customers and run your mail merge. Follow these steps:
- Navigate to the Customer Section:
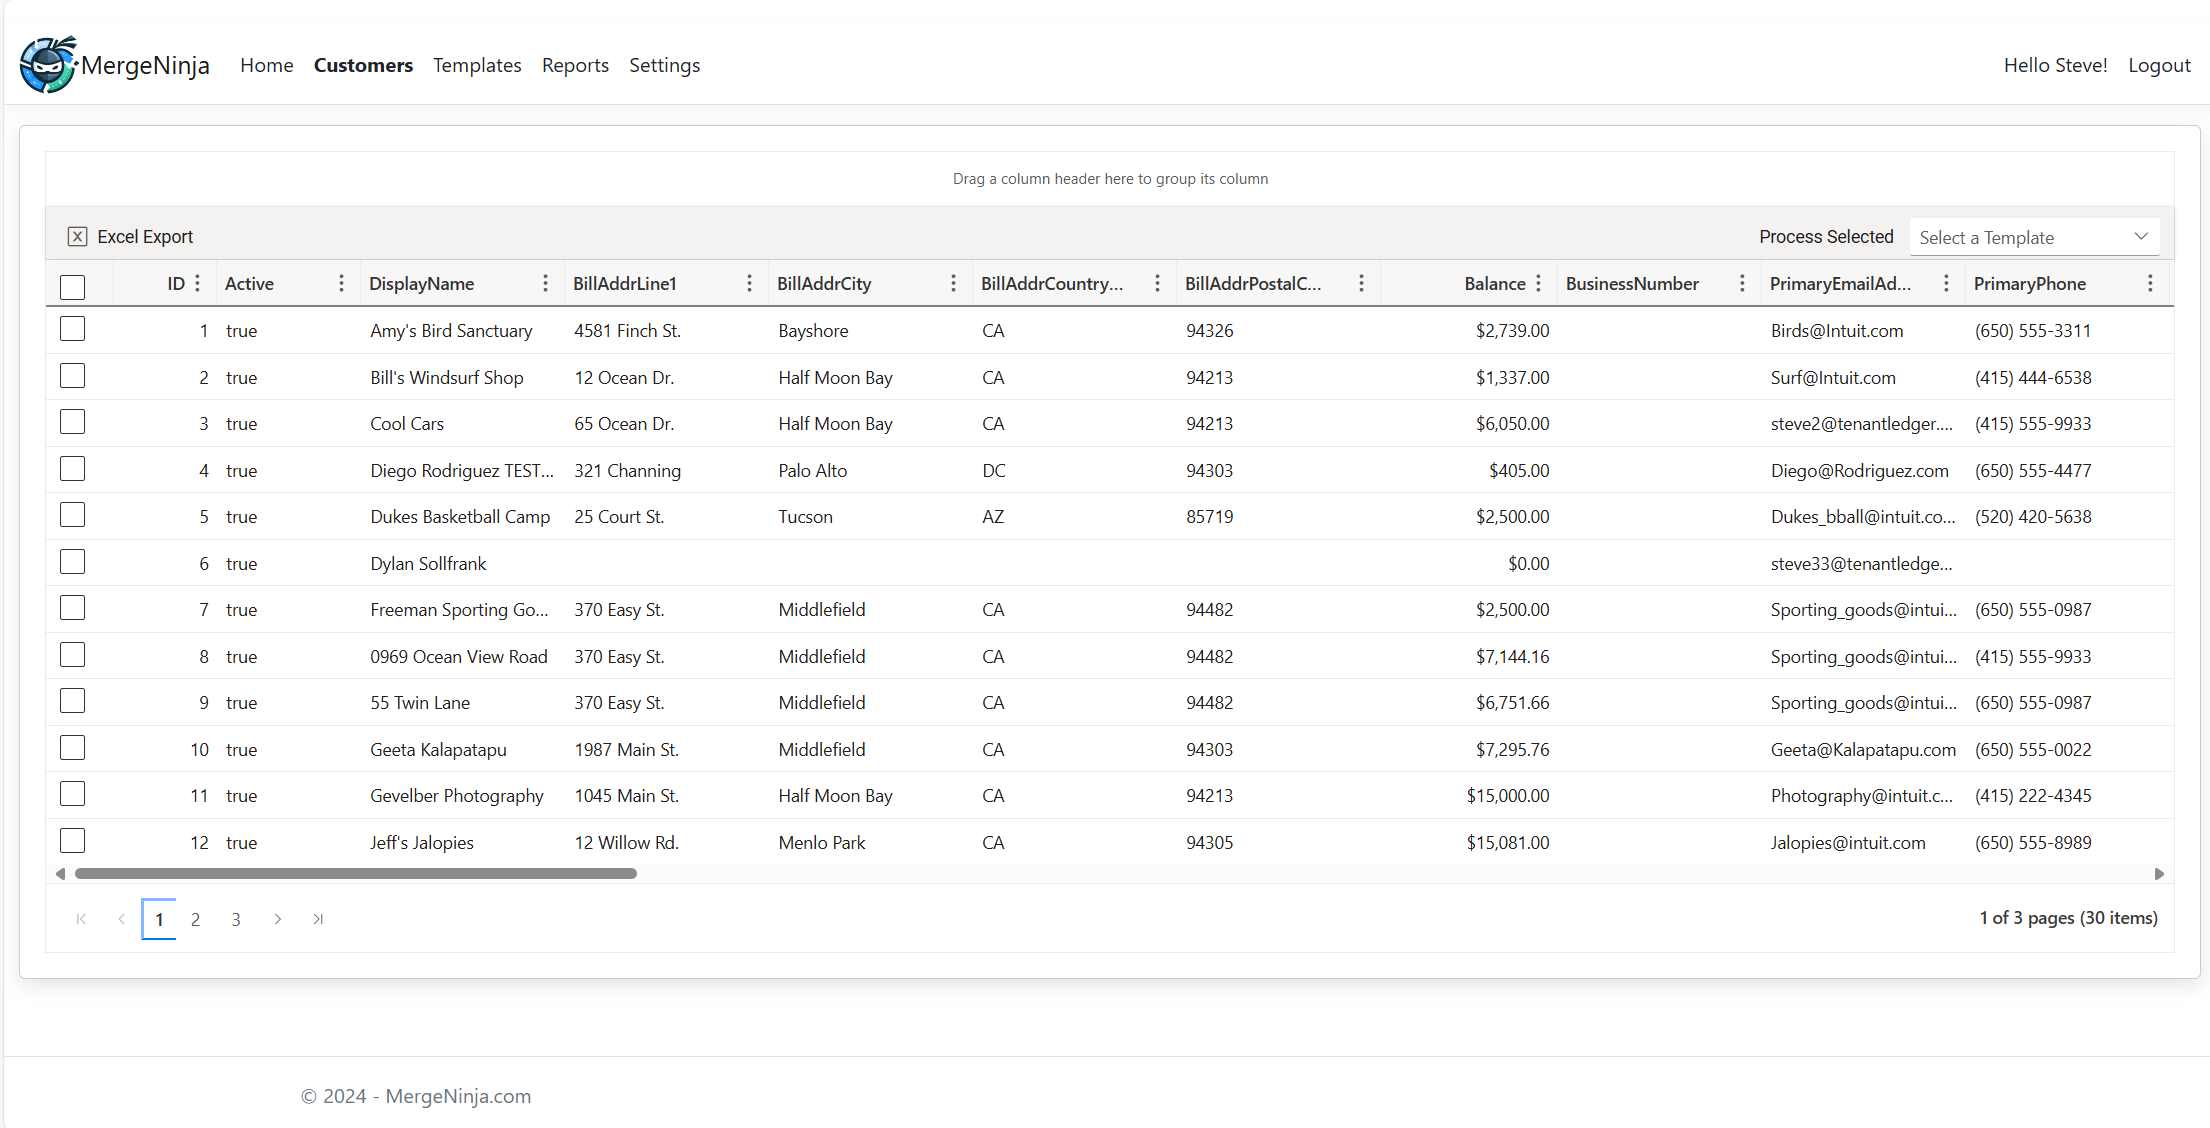
Go to the Customers section from the left-hand menu. You’ll see a table listing all your QuickBooks customers with their data in individual columns. - Filter, Sort, and Search for Customers:
Use the filter and sort feature in the table grid, similar to Excel, to group or narrow down your customers. You can filter by specific data fields or search for individual customer details. - Select Customers for the Mail Merge:
Once you’ve filtered and sorted your customer list, select the customers you want to include in the mail merge by checking the boxes next to their names. - Choose Your Template:
At the top of the table, there’s a Template dropdown menu. Select the template you created earlier from this menu. - Generate the Mail Merge:
Click Generate to start the mail merge. The report will run in the background, which may take a few minutes to complete. - Receive Email Notification:
You’ll receive an email notification when the mail merge is complete. You can then download the results from the Reports section in the software.
Need Help?
If you have any questions or run into any issues while getting started with MergeNinja, don’t hesitate to reach out to our support team. You can visit our Help Center or contact us directly at support@mergeninja.com.
